Translate

Wednesday, February 29, 2012

Check out the Prairie Cottage Store for New Fabrics - Now Available to Online Shoppers


We've just launched the new Prairie Cottage Store.  We'll be adding new fabric daily until we have listed all the thousands of yards we have in stock.  Check out our Backing Fabrics.  All the PCC patterns will go up in the new store tomorrow.

Thanks for looking in.

Tuesday, February 28, 2012

We Have A Winner!  And Get Ready for Our Next Lesson, "The Stem Stitch!"

Congratulations, Carol Williams, for winning the "Hawaiian Sue" quilt pattern!  Email me from my website at www.prairiecottagecorner.com and let me know if you want the pattern by e-mail or snail-mail.  Thank you, everyone, for entering.

Meanwhile, our next stitch adventure will be the Stem Stitch.  Sunhat Sam, below, will be our helper in this adventure in learning!  See you in a bit!


Monday, February 27, 2012

8 Great Potholders Embroidery Suggestions


Basic Embroidery Stitches for Appliqué

Over the next little while, I’ll be showing you the stitches I use with my appliqué projects.  Our model today is Sunbonnet Sue with her doll.  This is a 6” potholder design from our pattern, “Eight Great Potholders”.


We’ll be looking at and learning about the Blanket or Buttonhole Stitch, Chain Stitch, Lazy Daisy, Stem Stitch, French Knot and Satin Stitch.  In the Sue, above, you can see all but the Satin Stitch used.  I’ll also include some rarer stitches such as the Ribbed Spider and the Bullion Knot.

The first stitch of importance to appliquérs is the Blanket or Buttonhole Stitch.  This is the stitch that makes a nice, protective edge to your appliqué pieces, whether they are turned edges or raw edges with fusible webbing underneath.


Begin the stitch by going down through the appliqué piece about 1/8” to ¼” from the raw edge and coming up right next to the raw edge.  Always go DOWN through the appliqué piece.  Coming UP through the appliqué piece tends to raise it and may cause its position to shift.

To make your next stitch, go down through the appliqué piece again, about 1/8” to ¼” away from the first stitch, holding your working thread so that when you come up through the background piece at the edge of the appliqué, you are making a loop.  Pull the thread firmly (but not too tight) so that the fabric is not pleated or pinched. 

Continue this way until you need to rethread your needle.  To stop, make a stitch and immediately go down through to the back, anchoring your last stitch.  You can make a small knot or weave the remaining thread through your back stitching to tie it off.

 Here are some examples of how to use this stitch.


Here you see the Blanket Stitch in blue along the edge of Sue’s bonnet, in company with the Lazy Daisy and Chain Stitches.


Here you see it used on the tiny head of her doll as well as on her hand and dress.  This embroidery is over two-sided, fusible webbing.  For small, intricate shapes, the webbing works very well, as you can tell.


Here is the stitch used on her shoes in company with a tiny chain stitch.  We used one strand of embroidery floss here, since the shapes are so small.  These potholders bear up well with use but I see a lot of people just hanging them in the kitchen as decorations.  The embroidery does make them a little precious, I think.  I love appliqué with embroidery.


Here is the back of Sue’s dress and a bit of the sleeve with almost all the stitches in view.  They work very well together.


I hope you enjoy using these stitches.  I think I’ll give this pattern away for our next drawing coming up.
Happy Stitching!

Thursday, February 23, 2012

WE HAVE A WINNER!

One lucky person has won this week's drawing for the free pattern!  We are waiting for the winner to contact us back.  Meanwhile, here's the prize for next week's drawing.  Please get your entries (comments) in by Midnight, Monday, February 27th, PST.

Just leave a comment on any post here between now and midnight, the 27th.  You will be automatically entered in the weekly drawing!

Next week's prize is a free quilt pattern:

"Hawaiian Sue Quilt Pattern"

Twelve Sunbonnet Sues barefoot on the beach in Hawaii...what could be more fun? The Sue applique blocks alternate with a half-square triangle block to make a 61 x 79 inch quilt. This is a very simple quilt sewn in bright colors. You can order the Sues, ready-made, or sew them yourself. Ten page pattern in a 6 x 9 poly bag includes colored illustration, instructions and traceable pattern pieces.


Enter today to win this popular quilt pattern!


Sunday, February 19, 2012

Coming Soon!  "Red, White and Blue" 
Patriotic Pieced Quilt

Listen to the music of Anthony Kearns - God Bless America

Don't forget to leave a comment and automatically be entered to win a chance for a free pattern.  Drawings will be held each Tuesday morning, weekly.  This week's pattern is "The Ultimate Apron."


Watch for this new pattern coming soon to 

Saturday, February 18, 2012

"Simply Sue" - A great way to
 welcome SPRING!

Don't forget to leave a comment.  When you do, you are automatically entered for a chance
 to win a free pattern (below).

Yes, I said SPRING!  It's high time we looked  Old Man Winter in the eye and said it:  SPRING! SPRING! SPRING! SPRING!

So there!  I've put our "Simply Sue" pattern on sale this week at 30% off, in celebration of the Spring that must surely come soon.  That's a savings of $3.00.

Here's the "Simply Sue" quilt hanging in The Quilt Crossing in Odessa, WA
The pattern is really simple - you can do as much or as little embellishment as you want.  I like embroidery, so use it for all the small things like the shoes, flowers and accessories.

Here, I used some fabric pens to "paint" the baby doll face and blanket.  I added some eyelet for the petticoat and hat; and embroidery for the flower.  It's fun.
I hope you will try this pattern for yourself.  You can do all kinds of things with it.  Here it is in pastels AND crayon colors:

                                  
Happy Stitching - Visit Prairie Cottage Corner Store to buy this pattern.

Wednesday, February 15, 2012


Win a chance for a free pattern, "The Ultimate Apron", just by leaving a comment on our blog.


Comment on any post you like.  We'll draw names on Monday, February 20th, to see who gets the free pattern.

Thank you!

Bye, Bye, Miss American Pie – Thoughts on a February Day, Fifty-three Years Later

A recent piece on talk radio this past week got me to thinking about Don McLean and his song, "Bye, Bye, Miss American Pie."  There’s a lot written online about Don McLean’s song and I’m not going to try to add to all of that, too much.  I just love this song and others written by Don, like “Vincent”.  I thought I would add my two cents worth to the pile.  I understand Don does not comment on the song, now, if he ever did.  He's left it to others to interpret.

Starry Night by Vincent Van Gogh
I will say this, though:  If Don was critical of The Rolling Stones and their behavior on stage, and their ill-advised use of the Hell's Angels as body guards at Altamont, I agree with him.  The advent of evil and darkness in modern music represents a departure from music toward something else….not music.  Therefore, the music died.  Just listen to today’s Rap.  It’s neither beautiful nor uplifting.

But the music of Don's teenage years (and mine) was over-shadowed, not only by the satanic specters of the Stones and the Doors, but also by the political and social protest music of people like Bob Dylan and Peter, Paul and Mary.

I believe, in his song, he tells how the music he really loved and which he really expected to play for the world, in his life, died; and that music was, I believe, old-fashioned Rock and Roll (and, perhaps, Do-Wop, as well).  He says, in his song, it died, with Buddy Holly, Richie Valens and The Big Bopper, in a snowy cornfield in 1959; and again, when Bob Dylan became more popular than Elvis Presley; and again, when no single musician or group could keep up with the Beatles in their popularity; and, finally, when the Rolling Stones and others, like The Doors, took music out of the realm of beauty into satanic misery.

Buddy Holly


Many good and great musicians, including Joan Baez, Judy Collins, even, James Taylor, lived on the crumbs and in the shadow of the “most popular” through the 60’s, 70’s and 80’s.  The passing of the greats left a void, of sorts, where the less popular moiled and toiled to raise themselves up and go forward.  The greats, like the Beatles, Bob Dylan and the Stones, left behind a fragmented music industry, factionalized and struggling.  Rising up out of those ashes, is Don McLean’s historical, even epic, song, describing the rise and fall of a generation, born of “the Greatest Generation” but floundering in its own hugeness and confusion.

Well, I’m no expert.  I just have an opinion based upon the little I know and how the music affects me, personally.  Don was a very good musician, acquainted with pathos and beauty.  You can hear it in his voice and in the music he has written.  It’s especially evident in this song, American Pie.  You can hear his original version on the link, here.  You can also find his re-recording of it.  In the re-recording, done years after the original, he showcases his wonderful voice even more than ever.  He is a superb singer, really.

Don McLean
Listen to:  Bye, Bye, Miss American Pie by Don McLean

Thank you, Don and your friends, including Woody Guthrie, who once said he hated a song that didn’t uplift and present positivity and beauty.  Woody said songs that drag you down are bad, that he wouldn’t ever write such a song.  And he didn’t.  Have you ever heard his song about why he let a bunch of hound dogs “lick him all over (“Talking Hard Work Song”)?”  It's a truly humorous song about hard work and what a man will do to win over a good woman.  And what would the world be like without “So Long, It’s Been Good To Know You”, a song born during the Dustbowl when neighbors parted from neighbors, friends from friends and families from relatives in horrific conditions.  Or “This Land is Your Land?”, a celebration of American exceptionalism?

Sing on, muses.  We’re listening…from Beethoven to Josh Groban, we love to hear you.  What do you think?

Tomorrow, I'll get back to quilting, I promise.

Monday, February 13, 2012


"Romantic Valentine's Day Dinner for Two"


I’ve planned a romantic dinner for the two of us, my husband, and I.  It’s all about what makes US happy, so I’ve planned some of my favorite things and some of his favorite things.  He likes movies and snacks, and I have some of each.  He likes meat and potatoes, and I’ve got most of that together.  We both like restful music in the background, so we can talk and relax, so I’ve got some of that.  The party will begin at sundown.

We’ll have the table all set and sit down to a shrimp cocktail and a sparkling beverage.  Then we’ll have the main part of the dinner and save the dessert for the movies.  We’ll see one of mine and one of his.  My list includes "You've Got Mail" and "Sleepless in Seattle" and "While You Were Sleeping" and "An Affair to Remember" as well as others.  His probably runs to something like “Independence Day”, “Crossfire Trail” or “One Special Night” - - -

I like to use my mother's wedding china and my crystal for this meal. The tablecloth and napkins came from my husband's mother.  I love vintage linens for the table and use them every day.

Timing the meal

I picked easy items to make.  I don’t want to spend the whole day in the kitchen, do you?  First thing in the morning, I make the trifle and put it away in the fridge.  It needs to settle.  After that, I make the  squash and meat loaf, refrigerate them and pop each one into the oven at the last minute. The shrimp cocktail, I make just before dinner and it is served first, about half way through the time when the meat loaf is baking.  We like to take our time.  Between the meal and the dessert, we exchange cards and gifts.

It’s a sweet time for both of us….and it won’t be perfect.  If I’m too concerned about the timing, it won’t be fun.  So, I plan to enjoy the accidents along the way.  After all, it’ll still be early and we could go to the Drive-In, right?

The Valentine Menu

Shrimp Cocktail
Sparkling Cider
Meat Loaf Extraordinaire
Butternut Squash a la Buerre
Green Beans Scampi
Strawberry Trifle

In the background, some of our favorite music - - -

John McDermott – Believe Me
Israel Kamakawiwo'ole - White Sandy Beach
 James Taylor – How Sweet It Is
Theme from Somewhere in Time
Tracy Byrd – Keeper of the Stars


Movies for St. Valentine’s Day

I had to plan ahead for this one because not all were in our collection, but it was worth it.  For Christmas, I got him all the known Louis L’Amore movies that are available on DVD, so we might add one of those to my romance-type list.  Usually, we watch the action-packed movie first, then, have our dessert with the romance.

“An Affair to Remember” – Cary Grant and Deborah Kerr
“While You Were Sleeping” – Sandra Bullock and Bill Pullman
“You’ve Got Mail” – Tom Hanks and Meg Ryan
“The Ghost and Mrs. Muir” – Gene Tierney and Rex Harrison
“Random Harvest” – Greer Garson and Ronald Colman
And there’s always, Disney, you know:  Sleeping Beauty, Cinderella, Beauty and the Beast, Mulan, Cars (Cars?!!!).

The Recipes

Shrimp Cocktail

12 Medium Shrimp, cooked and chilled
½ c. tomato catsup
1 T. Horseradish Sauce
1 t. Lemon Juice
Place the catsup, horseradish and lemon juice in a small bowl and whisk together well.  Check the taste.  Some like more horseradish than others.  Divide into two sherbet bowls.  Hook the shrimp over the side and chill until ready to serve with a fork and a napkin.


Meat Loaf Extraordinaire

1 pound ground beef or chuck
1 medium onion, chopped fine
2 stalks celery, chopped fine
3 pieces of bread, crusts removed and cubed small
¾ c. tomato catsup
1 to 3 t. sage, according to taste (you should be able to smell it when the meat is mixed up)
½ t. salt
¼ t. pepper

Place meat and bread in a large bowl and set aside.  Saute onion and celery in a little butter with the sage until tender and fragrant.  Remove from heat and stir in catsup.  Add the veggies to the meat and bread.  Add salt and pepper and mix well with clean hands.
Spoon into a loaf pan and bake about 50 minutes at 350 degrees F.  Let stand 5 minutes before serving.

Butternut Squash a la Beurre (Butter)

Pierce the squash in three places deeply and microwave in 5 minute intervals on high until the skin gives when you poke it.  Slice open and remove seeds.  Spoon out flesh and place in a small casserole dish.  Top with butter and brown sugar and bake at 350 degrees F until butter and sugar are melted together.

Green Beans Scampi

Place 1 or 2 cans of French-cut green beans in a saucepan.  Add 1 or 2 cloves of garlic, crushed.  Heat to boiling and simmer 5 minutes.  Serve with a dot of butter and salt and pepper.

Strawberry Trifle

1 bag frozen strawberries
1 loaf Angel Food Cake
1 pkg Jello instant Vanilla pudding
1 Pint Heavy Cream, sweetened and flavored with vanilla, whipped

Thaw strawberries and cut all but five of them in quarters.  Cut the cake in 2” cubes.  Make the pudding according to instructions.  Whip and season the cream.

In a trifle bowl or a clear glass bowl, place a layer of cake cubes, topped with a slathering of pudding.  Next, place a layer of strawberries and a layer of cream.  Make more layers in the order given until almost all used up.  Top with whipped cream and dot with the five whole strawberries.

You can also make this in a parfait or other tall glass for individual servings.

Have a look at our "Heart Etui (needle case)" pattern at Prairie Cottage Corner.  (See the fourth previous blog post about the etui.)  If you buy it on Valentine's Day, I'll email it to you, specially, so you can give it to someone you care about on the day.  Try to make your purchase before 5 pm PST, will you?  I'm going to be busy after that.  LOL.  Prairie Stitcher


A Homemade Snack

My quilt friends and I were looking for a snack we could make at home with stuff on hand, for a quilting afternoon or a retreat.  We found this recipe from Martha Stewart online and paired it with a dip we have been making for years.

We just have one suggestion.  Be sure to minimize the amount of time you spend mixing the crackers in the food processor; AND, after refrigerating the dough, slice the chips 1/8" thick.  These two maneuvers will make a more tender cracker.  Honestly, these are almost as good as Cheese-Its.

Martha’s Cheddar Crackers
1 cup all-purpose flour
2 tablespoons yellow cornmeal
1 1/4 teaspoons coarse salt
1/4 teaspoon cayenne pepper
Pinch of freshly grated nutmeg
2 tablespoons very cold unsalted butter, cut into small pieces
1 cup finely grated (2 1/2 ounces) Cheddar cheese
1/4 cup plus 1 tablespoon milk
Directions

Combine flour, cornmeal, salt, cayenne, and nutmeg in bowl of a food processor fitted with the metal blade; pulse to combine. Add butter, and pulse until mixture resembles coarse meal. Add cheese, and pulse until combined. With machine running, add milk. Process until dough comes together and is well combined.
Transfer dough to a clean work surface. Shape dough into a 1 3/4-inch-wide log. Wrap with 2 layers plastic wrap and refrigerate for at least 24 hours and up to 2 weeks or frozen for up to 4 weeks.
Preheat oven to 325 degrees. Slice well-chilled log into 1/4-inch-thick slices. Transfer the slices to a parchment-lined baking sheet, and bake immediately, rotating sheet halfway through baking, until crackers are golden brown and firm in the center, 25 to 35 minutes. (Crackers should not get too dark around edges.) Transfer to a rack to cool. Crackers may be made a day ahead and kept in an airtight container at room temperature.

Baked Dip
½ c. mayonnaise
½ c. sour cream
1 c. grated Parmesan cheese
1 can artichoke hearts, drained and chopped small
½ c. minced onion
1 T. lemon juice
Salt & pepper to taste
Preheat oven to 400 degrees F.
Mix mayonnaise, sour cream, Parmesan and onion together in a small bowl.  Stir in hearts, lemon juice and seasonings.  Taste to adjust flavor.  Pour into a small, shallow baking dish.  Bake 20 minutes until light brown on top.  Serve with Martha’s Cheddar Crackers.  You can make this a day ahead and bake it at the last minute.


---------------------------------------


Sunbonnet Sue is alive and well at Prairie Cottage Corner.  Please visit and see our new quilt patterns and selections.  There's a SALE going on now, too, in our catalog store.  Visit often, please, and tell us about your latest adventures in quilting with Sunbonnet Sue, quilting, applique and other needle adventures.


"A Valentine for Your Stitching Friends"

Valentine’s Day is coming up fast.  It’s the after-Christmas bright spot, in my view, so I make the most of it.  I still have some red candles left over from Christmas, for a romantic dinner for two.  More about that, later.

Your friends who stitch need Valentines, too.  Here’s one that will last a while and remind someone they are special and loved.

This is our newest pattern for a little needle case we call “Heart Etui”.  It takes a few hours to make…….just a few.  It’s about 5” x 5” all in all and consists of two hearts hinged on one side and tied on the other.


I added appliquéd leaves and a flower to the front but you could add whatever decoration you like such as ruched flowers, fussy-cut pieces or yo-yo's.


I cut the fabric pieces out using freezer paper and ironed them to the wrong side of the various fabrics (cotton setting, at least; no steam; 5 seconds), and added a ¼” seam allowance.


 I quilted the batting onto the front and back of the etui so the stitching would show on the outside.

 Each of the three leaves and the six petals were finger-pressed to the back side of the freezer paper and basted all around, except for the bottom inside, which would be under other pieces.  It takes a little planning to figure out how much NOT to baste.  You can see what is needed by, first, laying the pieces out as they will appear in the finished product.

I added the leaves to the front, first pinning, then blind stitching them in place.  I trimmed the inside ends of them, removed the basting, and pulled out the freezer paper


 I laid out the petal pieces to see the order of them and began pinning and blind stitching them in place, starting with the bottom-most petal.

I left the inside ends of the pieces open and removed the freezer paper from there.  Once the basting threads are out, it’s easy to pull the paper out.


Inside, I added a pocket that buttons shut.  Behind the pocket is a space for little scissors, held in by a ribbon.  I used gross grain ribbon for this.  It’s kind of wide, but it wears very well.  Satin ribbon is pretty, but wears out after constant use.  I had some  novelty buttons, as you can see, which add a little whimsy to the effort.


I embroidered the needle pad before attaching it to the inside heart pieces.  All the additions were made before the fronts and insides were sewn together.  You can add any message you like.  Print one out on your computer in a font you like, and trace it onto the pad.


 I added French Knots and Stem Stitching for detail on the flower and leaves.


 The Heart Etui is easy to slip into a purse or bag and take along with you.  You can sew while you wait for an appointment.  I keep several different needle cases with me and have each one fully equipped.  Since I do a lot of appliqué, I can keep my little project in a tote or a baggy with the etui, and sew when time allows.


You can purchase this pattern at Prairie Cottage Corner today.

Sunbonnet Sue is alive and well at Prairie Cottage Corner.  Please visit and see our new quilt patterns and selections.  There's a SALE going on now, too, in our catalog store.  Visit often, please, and tell us about your latest adventures in quilting with Sunbonnet Sue, quilting, applique and other needle adventures.


Happy New Year!!!!

I tried variations of two recipes for New Years Eve and they were very good:  “Oysters Rockefeller” and “Chili Rellenos”.  I had to make variations with the Oysters  because, out here on the prairie, they sell wonderful Willapa Bay oysters, but no shells….and Oysters Rockefeller requires shells.  What to do?
I made the recipe in a muffin tin, a six cup tin for over-sized muffins.  The muffin cups served as my oyster shells.  Here’s my variation on the original recipe:

Kathie’s Oysters Rockefeller – A great starter for any meal

Preheat oven to 350 degrees F.  Grease a six-tin oversized muffin tin (even if it has a non-stick surface).

3 or 4 flour tortillas
6 pieces of bacon, fried but not too crisp, cut in 1” pieces
1 pkg frozen spinach, thawed and drained well
1 ¼ c. heavy cream
2 T. butter
¼ c. minced onion
1 clove garlic, minced
2 T. all purpose flour
2 c. Italian Blend shredded cheese
I jar Willapa Bay oysters (about 4-6 large oysters)
6-12 fresh lemon wedges

Using a round cookie cutter or a drinking glass, cut six circles from the flour tortillas to fit the bottom of the muffin tin cups.  Poke them all over with a sharp fork, place on a cookie sheet and bake them until they are lightly browned, about 20 minutes.  Remove and place one in the bottom of each cup.

Fry the bacon and drain well on paper towels.  Set aside.

Sauté the onion and garlic in the butter just until fragrant.  Stir in flour and cook about 1 ½ minutes.  Add cream and heat through until thickened.  Add spinach and heat through.  Remove from heat and set aside.

Rinse and drain the oysters and cut them in chunks to fit the tins and so there is enough for each serving.

Place a tablespoon of cheese on top of the tortilla round in each cup.  Put a few pieces of bacon atop the cheese, followed by the oysters.  Cover the oysters with the spinach sauce, topped with more bacon.  Last, put enough cheese on the top to cover all and to kind of “seal” the cup.

Bake about ½ hour until bubbly and slightly browned.  Remove and let set about 5 minutes before serving.   Using a silicone spatula, free the oysters from the sides of the cups.  Then, remove them to a chafing dish or platter for serving.  They look nice on a piece of red or butter lettuce.  Serve with lemon wedges on the side.   You can make these ahead and refrigerate until party time.

~~~~~~~~~~~~~

My friends know I love Chili Rellenos, sort of.  I mean, I love to eat good ones, and good ones are few and far between.  Most recipes and restaurants insist on deep frying grotesque whole pablanos in corn meal and serve them in a pool of grease.  Yuck.  What an ignoble end for a great food idea.  I mean, what is more logical than to melt lovely cheese inside a flavorful vegetable and serve it with a lovely sauce?

So, I took to making rellenos with canned whole green chilies, stuffed with Jack Cheese and wrapped in crepes with chili gravy over the top.  It’s a wonderful meal, but very time-consuming.  On New Year’s Eve day, I didn’t have time for crepes and such, so decided to improvise.  Also, I had some medium cooked shrimp I didn’t quite know what to do with.  Following is the result:


Kathie’s Muffin Tin Chili Rellenos with Shrimp 
and Chipotle Sour Cream

Preheat oven to 350 degrees F.  Grease a 12-cup muffin tin, even if it has a non-stick surface.

3 or 4 flour tortillas
2 c. shredded Mexican blend cheese
12 medium cooked shrimp, tails removed
4 small cans whole green chilies (Ortega or some other brand), or, 12 green chilies, roasted, peeled, and seeded
½ c. medium salsa

Using a round cookie cutter or a drinking glass, cut six circles from the flour tortillas to fit the bottom of the muffin tin cups.  Poke them all over with a sharp fork, place on a cookie sheet and bake them until they are lightly browned, about 20 minutes.  Remove and place one in the bottom of each cup.

Halve the chilies lengthwise.

Place 1 tablespoon of cheese on the tortilla, then, a chili half, more cheese, a shrimp, then, a chili half.  Place a dollop of salsa on top of the chili and seal the cup with cheese.

Bake about ½ hour until bubbly and slightly browned.  Remove and let set about 5 minutes before serving.   Using a silicone spatula, free the rellenos from the sides of the cups.  Then, remove them to a chafing dish or platter for serving.  They look nice on a piece of red or butter lettuce.  Serve with sour cream on the side.   You can make these ahead and refrigerate until party time.
Chipotle Sour Cream

½ c. sour cream
1/8 to 1/2  t. ground chipotle or jalapeno peppers or cayenne pepper

Start with the smaller amount and mix and taste to your own tolerance of heat.  This is meant to be spicy so guests with an aversion to the heat should be offered plain sour cream.

I hope you enjoy these recipes.


So, What's a "Corn Bag"?

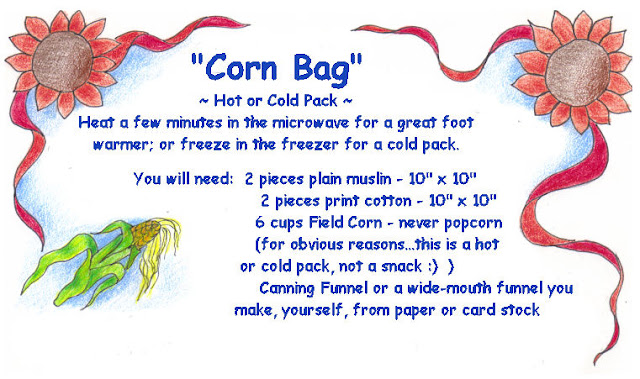
Rice Bag and Bean Bag hot and cold packs abound, handy little cotton bags or socks that can be nuked for a heat treatment to a sore muscle or cold feet, or frozen to chill a bruise or a strain.  They're very handy.  In our quilt guild, this month, our intrepid teacher, Laura Estes (Sage Country Quilts), demonstrated making a Corn Bag, which serves the same purpose as it's cousins, but seems to hold the heat longer.  Here's the pattern, for you.


1.  Field Corn direct from the elevator can be quite rocky.  If you get corn from a local bulk foods store, it will be clean and require little picking over.  You never use popcorn in this bag, for obvious reasons.  Nevertheless, some of the Field Corn will pop, but don't worry about it.  Place the corn in a colander and shake out any dirt or debris.  Pick out any rocks but don't go overboard.
2.  Place the print squares right sides together.  Add muslin squares to the top and bottom of the stack.  Pin as shown, below:


3.  Stitch all around, beginning at one side of the opening and ending at the other side of the opening.  Turn the bag right side out and finger press, poking out the corners, gently.
4.  An extra pair of hands helps with the next step.  Have someone hold the bag open with the funnel in place.  Pour the corn into the funnel.  Sew up the opening by machine or hand.  All done!


Sunbonnet Sue is alive and well at Prairie Cottage Corner.  Please visit and see our new quilt patterns and selections.  There's a SALE going on now, too, in our catalog store.  Visit often, please, and tell us about your latest adventures in quilting with Sunbonnet Sue, quilting, applique and other needle adventures.


"Starters and Stoppers" Quilt

One of the problems with my Singer and my Bernina sewing machines is that they can "eat" small patches of fabric right at the start of the stitching of them.  The wide slot in the throat plate, that allows for the zig-zag stitch on these machines, is a great place for the old needle to stuff all kinds of little quilt patches when it doesn't easily pierce the stuff on the first stitch.  Consequently, I have always used "starters and stoppers" when chain-piecing and sewing small pieces.

What are "Starters and Stoppers", or, S&S's?

They can be any small scrap of any shape which you use, doubled, to make a smooth transition between one piece and another.  I have often used any old piece of fabric lying around and stitched over it again and again, then, thrown it away.  Then, my friend, Joyce, told me she was using her S&S's to make a quilt, while making a quilt.  I bet you're more confused than ever, now.

Joyce showed me how she rotary-cut 2 1/2" squares of light and dark fabric from scraps, and stacked them, alternating colors and shades, beside her machine when she was quilting.  When making a series of units for a block, she would, first, sew onto a pair of the 2 1/2" squares (right sides together), 1/4" from the edge, ending about 1/2" from the corner of the side.  Then, she would lay the first patches to be pieced in front of the presser foot, start the machine, sew off of the S&S and right onto the patch; and continue on, chain piecing the patches.  At the end, she would sew off on another, new pair of S&S's, stop the machine near the edge and snip the patches out from behind the presser foot.  The presser foot would remain down on the S&S, ready to begin a new chain.  In the course of sewing just 12 blocks for a quilt, Joyce could produce quite a stack of S&S's.

When she had quite a few of them, she made them into Four Patch blocks.


When she had quite a few of the Four Patch blocks, she added sashings and borders and VOILA!  A quilt!

So, I started using the 2 1/2" S&S's a couple of years ago.  As a matter of habit, I just kept cutting up my scraps and using them as I pieced quilts.  Last winter, I noticed I had quite a few of them, so put together a little quilt for my grandson, Cole:


A "Starters and Stoppers" Quilt made for my grandson, Cole.


After I made the quilt, I noticed I still had a lot of S&S's, so I made a quilt as a donation for our local women's shelter.  And I still had quite a few left.  So I made two more quilts for grandsons, Dylan and Carsen.  I literally had enough of the little blocks to make four single-bed quilts!  Easy as pie, too, and the boys love them.

You can do this, too.  It becomes a habit that can garner some real benefits.  Hugs for your children and grandchildren and all your loved ones can be given with quilts.  Life is grand.


Sunbonnet Sue is alive and well at Prairie Cottage Corner.  Please visit and see our new quilt patterns and selections.  There's a SALE going on now, too, in our catalog store.  Visit often, please, and tell us about your latest adventures in quilting with Sunbonnet Sue, quilting, applique and other needle adventures.