

One of my sewing boxes. I like sewing boxes. I don't have enough of them. I think I should have one for every project. Not that I have a lot of projects but I do have more than two. Ergo, I should have at least 4 sewing boxes. Is each box fully equipped? No. I have an etui, needle case, which is my basic mainstay for applique', below. I put it in with whatever project I'm currently working on because it has all my basic hand-sewing tools.

This etui holds my embroidery and applique' tools. In the center section are my applique' needles; on the right, are the embroidery needles plus a few pins, both straight and safety. In the right hand pouch are two steel thimbles, one for regular sewing and one for quilting. In the center pouch is my under thimble (for the middle finger, left hand, which opposes the needle underneath when quilting), a small metal needle threader and some finger cots (to protect my fingers and help pull the needle when sewing). On the left are my scissors and tweezers. This etui folds up by overlapping the right and left sections and is held together on the outside with a cloth-wrapped elastic band. I use this bifold etui more than any other one I have.

Just as an aside, above is a neat little thread holder and pin cushion combined. The thread spools are held in place by a piece of ribbon that runs through every one of them in every section all around the cushion. To dispense any of the threads, just pull the strand and it comes right off for you. The small spools in the holder are Superior Threads topline threads. I use them for applique' when I have matching fabric for them. They are wonderful threads, smooth and tangle-free for the most part.

A while back, I was making a new sample of my etui pattern called Heart Etui, for a shop. I covered how to make this needle case in another post, several years ago. The inside needle pad is this heart-shaped piece with a saying on it. It holds tons of needles when full. On the outside of the Heart Etui are some leaves and a flower which I put there using Freezer Paper Applique'. Freezer Paper Applique' is my favorite way to do applique'. It looks just like needle-turned applique' when you're finished. It takes a little longer than needle-turned but has the advantage of being fool-proof as to the final shape of the pieces and their placement on the background. In order to achieve the right effect, though, one needs a few tools and tricks, always.

Here are the leaves. I've traced the leaves from the pattern page onto Freezer Paper, then, ironed the Freezer Paper to the back of the fabric. Then, I cut them out about 1/4" away from the freezer paper edge. Next, I basted a hem all around the leaf using white thread. I always use white thread because colored threads can "dye" the fabric sometimes. After the pieces are blind stitched to the background, I remove the basting threads and the paper.

Here are all the pieces for the front applique' of the Heart Etui. There are three leaves, five or six petals and the flower center. Since the petals are overlapped by the flower center, I need hem only the portions of the petals that will show.
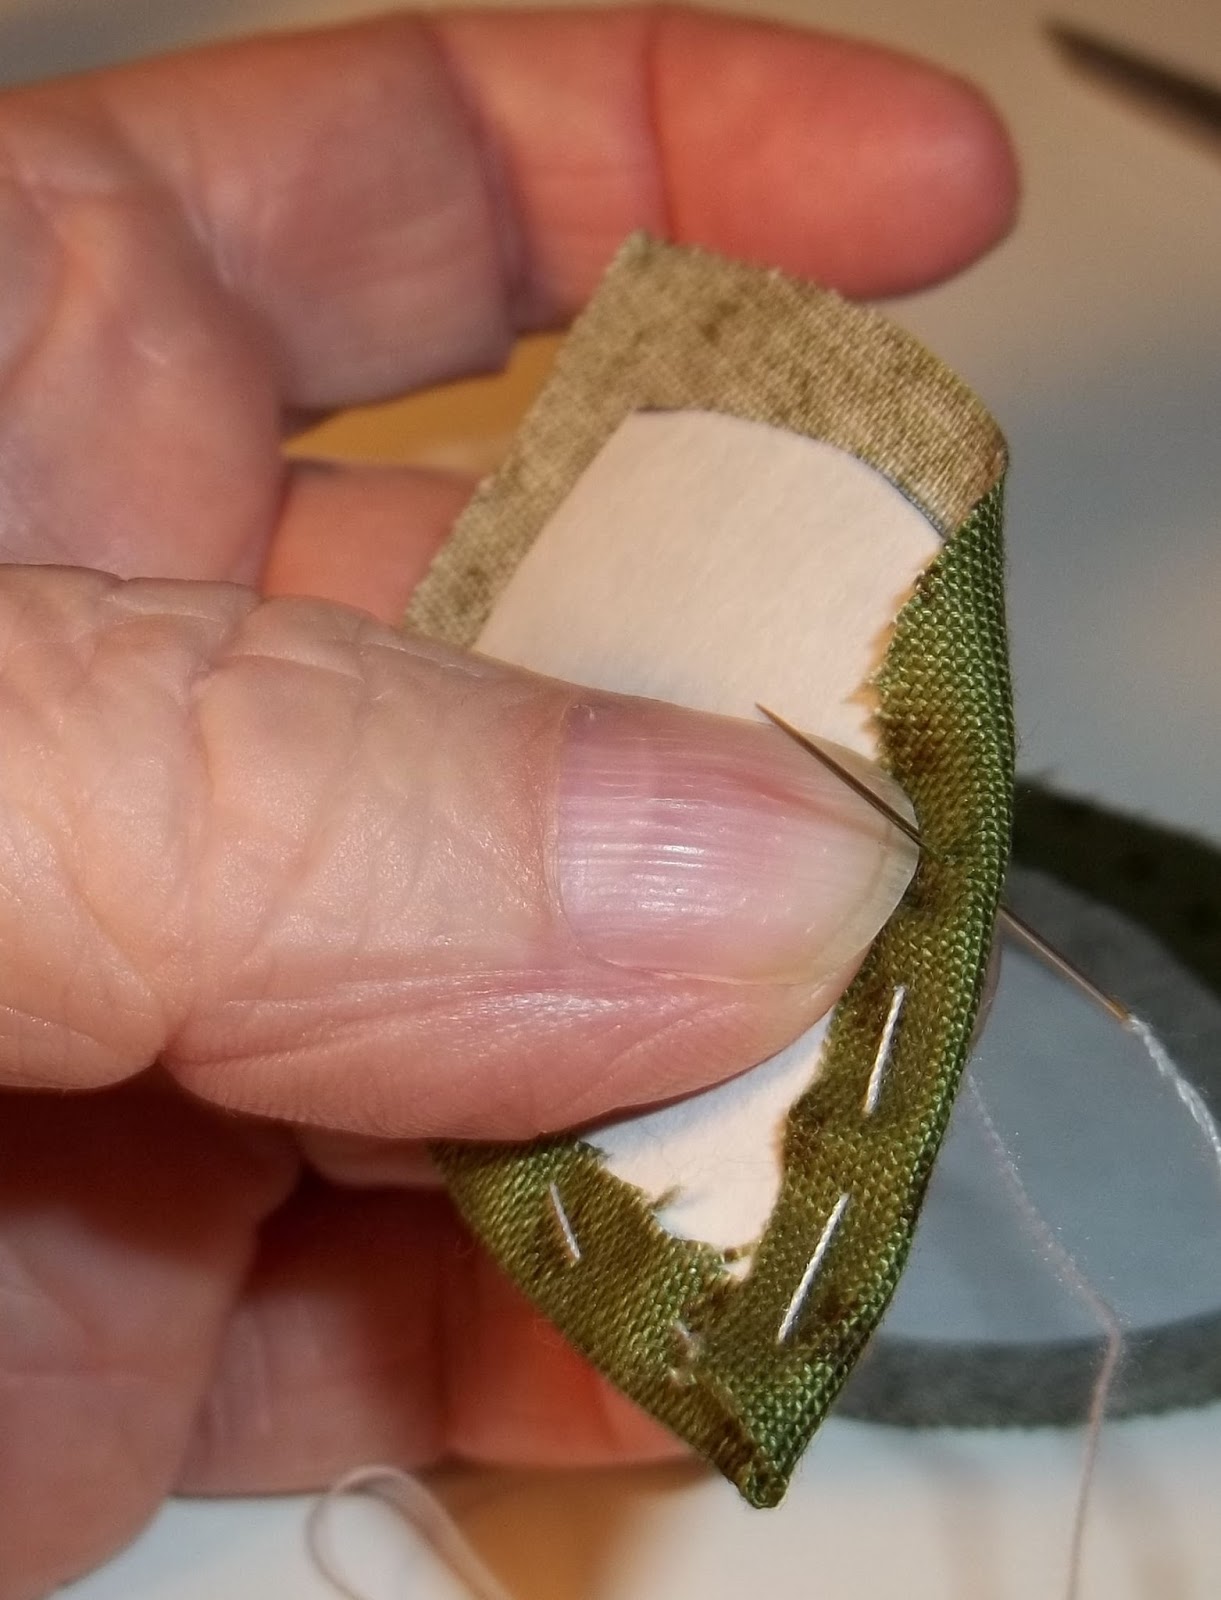
Here I am, basting the leaves.

Begin on the right, upper side of the leaf and let your knot show on the top of the piece. End, without a knot, on the top as well. That way, when the piece is sewed down, you can easily remove the basting threads.

When I'm getting ready to Blind Stitch the pieces in place, I thread all my applique' needles I will need, at once, using this nifty Clover needle threader. Then, I put all the threaded needles in my bifold etui and use them, one right after another so I don't have to break away from stitching for too long to rethread. The needle sticks straight up in a hole on the top of the threader while the thread to be used is held over the middle slot of the threader, gently but firmly. The lever on the right is pushed down and the thread is looped through the needle inside the threader.

You can see, here, the thread looped through the eye of the needle. I blind stitch with a single thread, so I secure the thread at the top of the needle with a little slip knot. I knot the end with a quilter's knot. Then, I'm ready to sew.

Here are the leaves, top, underside and unfinished.

Here's a leaf all hemmed and ready to go. To do the points, bring the fabric point straight down over the paper point and fold the sides over it. Secure with a hem stitch and you have almost perfect points all the time.

Here's the front of the Heart Etui, with the leaves glued in place.

When gluing, put dots of glue all around the piece, on the fabric not on the paper. Try, also, to avoid gluing the hemming threads, but that's not always avoidable. Flip the piece and press it down for about 1/2 hour with a heavy book or something like that.

One of the down sides of hand sewing is the wear and tear on fingers and fingertips. Some stitchers don't care if their fingertips are abraded and rough. I can't bear it, myself, so I protect my fingertips with little sleeves or cots, cut from plastic gloves. Yes, I'm a woose about this.

But the cots not only protect my fingertips, they also help build traction on the needle when I have to pull it through multiple layers of applique'.

And, yes, they do wear out rather fast. I usually go through a pair of them in a day of sewing. But they're relatively cheap and handy.

So here I am, with thimble, ready to go.

Blind Stitching is my favorite part of the applique'. It's when the piece really starts to take shape. Here you can see the hem basted leaf, glued with a few dots of glue to the background. I've taken a stitch and buried my knot, then, come up through bare edge of the leaf, picking up about three strands of the fabric right on the edge. Then, down through the layers, beside the last stitch, and up, again, about 1/8" away from the last stitch, picking up about three of the woven threads of the leaf fabric.

Here, you can see it from another angle.

After finishing the blind stitching all around, except for the end that will be under the flower petals, I cut the basting thread and pull them out.

Then, pull out the freezer paper....

...and one leaf is done. Now for the rest of them.

Here they are, all stitched, all freezer paper removed and the points held in place by pins, ready for the petals to go over the tops.

Same process again, placing, gluing, blind stitching.....

...and removing the paper. Below is a sketch of the finished front of the Heart Etui.

I hope this helps your hand applique' somewhat. We have a group of stitchers who meet weekly at our local quilt shop, Experience Quilts!. We call the group "Unplugged" because we are all doing hand work of one sort or another....some applique, embroidery, knitting. Anything that doesn't need to be plugged in is allowed. It's a lively group.