"Working the Stem Stitch in Embroidery"
It’s important,
when using this stitch on appliqué, that you try to stitch through all layers,
not just the top layer. If you are
stitching through just two layers, it’s easy.
More than that, will be harder, but try to go as deep as you can. The stem stitch is great for, um, making
stems….on plants and flowers….and little vines.
It’s also great for outlining almost anything, especially appliqué piece
edges. It’s great for “drawing” with
thread to describe details of a piece such as how you see it in these pictures
of the “Wilkommen”, from our pattern of the same name.
It
makes a nice twisted thread line on the surface of the piece. Here’s how it’s done.
When
I teach a class, I make up little samplers for the participants out of some
simple materials. I make each student an
embroidery “hoop” out of tag board; two circles, basically, about 6” in
diameter. I staple these to opposites
sides of a piece of white cotton cloth and draw some lines on it for them to
follow.
Most
any needle will do, but if you plan to continue to embroider with your
appliqué, you will use a couple of different needles quite a lot. The needle on the left is an embroidery
needle. The one on the right, is an appliqué
needle.
Notice the size of the eye. The embroidery needle has a large eye, which
makes it good for using varying amounts and sizes of thread. I usually use two strands, but for work that
needs more bulk, up to six strands can be managed.
By
contrast, the appliqué needle is thin with a tiny eye, making it useful for
working a single strand of strong thread in tiny stitches needed for the blind
stitch used by most stitchers to anchor appliqué pieces. It goes through several layers of fabric
without too much trouble. It’s also a
little flexible, which is useful for maneuvering. More on appliqué, itself, in another session.
"Oh, What a Tangled Web..."
To
begin, one of the most frustrating problems for beginners is that of getting
one or two strands of floss out of a skein without tangling up the whole
thing. Here's how to overcome that little problem.
Pull
about 18” of six-strand floss out from the skein and snip it off. You don’t want to sew with a longer length than this because it will wear out and break
before you ever get down to the end of it.
Beside that, it tangles horribly.
So
once the six-strand length is cut, hold the thread in your left hand, near the
end you will thread through your needle, and pull one strand straight up and
away from the bunch, holding back the strands that gather as the strand is
pulled, with your other hand. Lay the strand aside and smooth
the remaining strands out straight again.
Then, pull another strand out the same way. We will be using two for this project so that
is all you will need here. But, even if
there are only two strands left of the hank, you still must separate them in
this same way so they come untwisted from one another.
Moisten,
trim and thread the two strands through the eye of the needle. Always thread the end that came out of the
skein or off the spool, first, through your needle. Thread has a slight “nap” to it, according to
how it is twisted during spinning. Using
the right end will prevent additional tangling and help your thread to be your
friend and not your enemy.
For
this exercise, you can make a knot in the end of the strands, if you like. Later on, I’ll show you how to weave your
thread ends into the back of your embroidery so that the back is smooth and
almost as pretty as the front. For
appliquéd quilting, though, the back is never seen in the final product so
knots are okay.
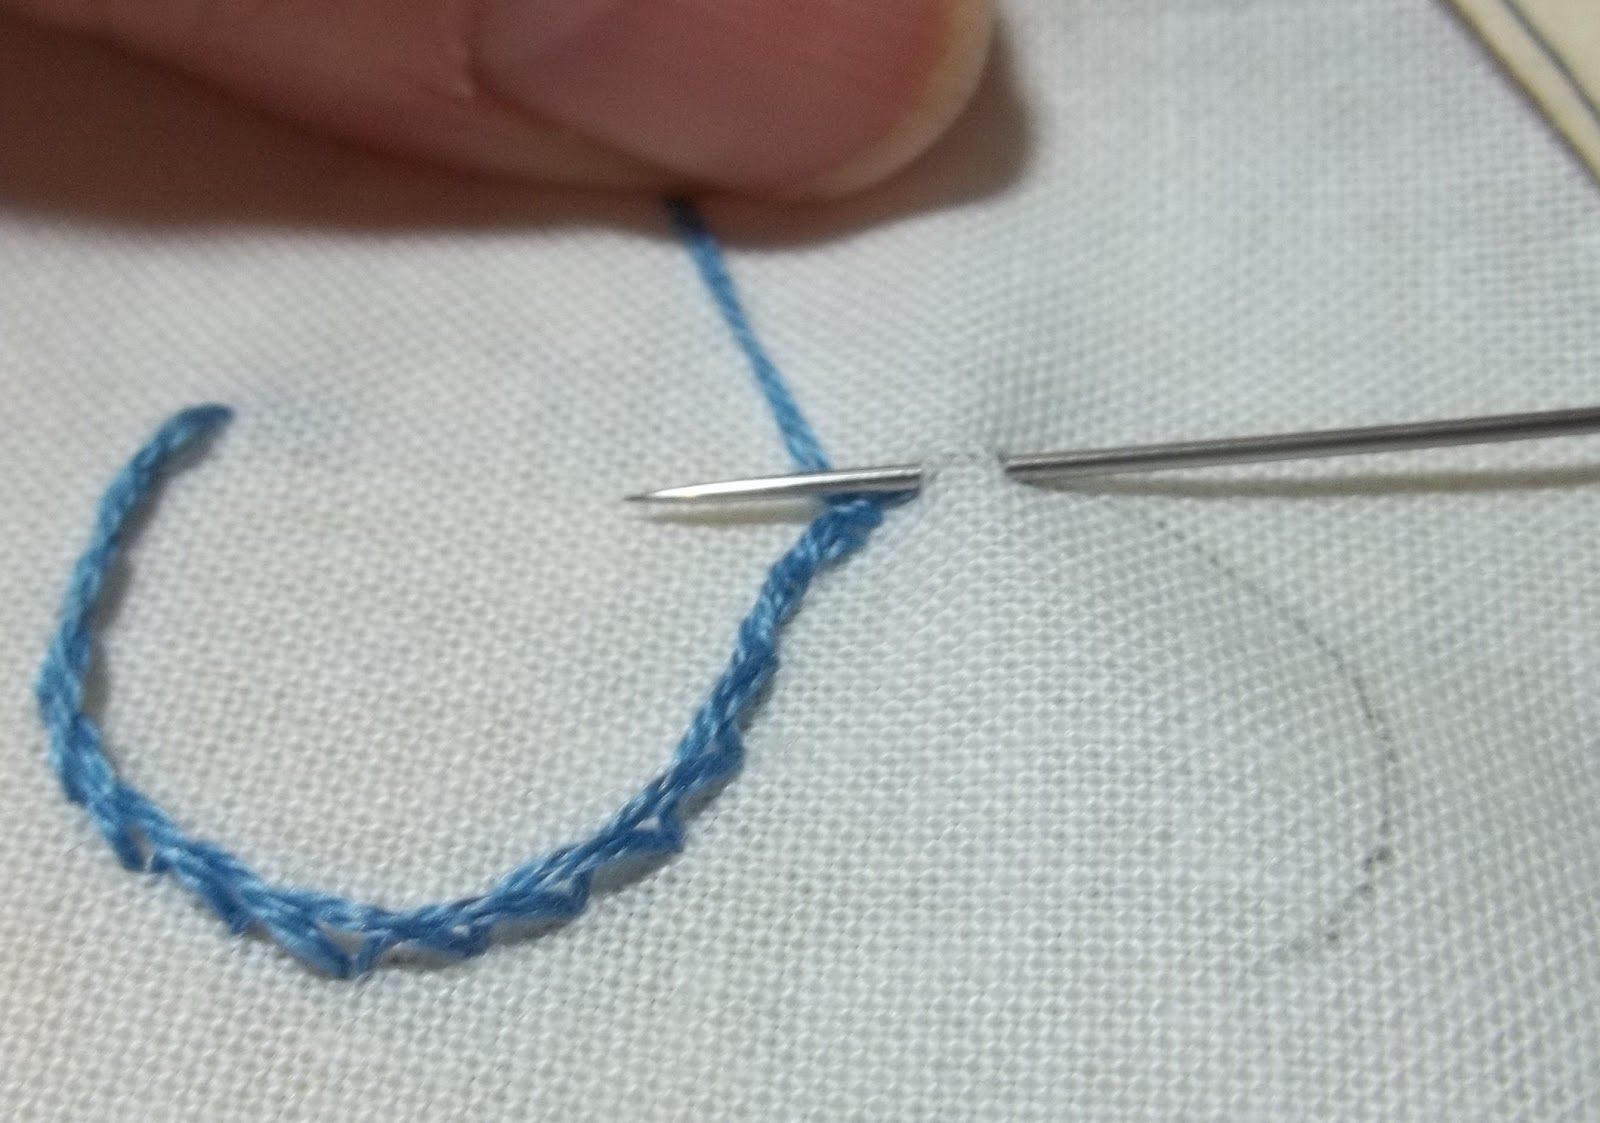
Bring
the thread and needle to the front on the line of travel.
Insert
the needle about 1/8” to 1/16” from the start point and bring it back up in the
same hole made by bringing the thread to the front.
Tug
the stitch firm and hold the working thread down below the line of travel.
Make
your next stitch as before.
Continue
on until you have finished the line or run out of thread. Before you run out of thread, always be sure
you have enough to take to the back of the work and weave through or make a
knot.
Here
is the back of the piece we just stitched.
This is how the back of the stem stitch looks.
Weave
your remaining thread under the stitches on the back of the piece 6 or 7 times….enough
to hold it and keep is from undoing itself.
Or just make a couple of half-hitch knots through the first stitch, if
the back is not to be seen.
This
is how the finished woven fix looks when done.
Snip off your thread close to the work….closer than I’m showing here, so
the ends don’t show in the front as a shadow on the white background.
"Using the Stem Stitch on
Curves"
The
stem stitch works well on curves but I like it to have the same look on an inside
curve as it does on an outside curve. Draw
an “S” on your sample fabric about 2” tall.
When you look at it, the first curve I am stitching on this “S” is an
outside curve. Holding the thread to the
outside of the curve makes it lie down very nicely and it holds the line of
travel very nicely. But when you go
around the other curve, at the top of the “S”, the stitch doesn’t look quite as
good and doesn’t describe the line of travel quite as well. I call the upper curve of the “S”, the inside
curve, just for the sake of this demonstration.
To
stitch the inside curve (below), move your thread
above the line of travel just before you begin the curve and continue as
before, all the way to the end of the curve.
The transition is nearly invisible in the line of the stitch, and the
inside curve looks as smooth as the outside curve.
The
finished “S” with both curves lying quite smooth and sweet. End of lesson. Now, you can stem stitch to your heart’s
content!!!
By the way, I will be giving away a copy of
the "Eight Great Potholders" pattern this
week to someone whose name we draw
from our readers who leave a comment on
this post by Midnight, PST, Monday,
March 12th, 2012.
Here is a sampling of each potholder figure.....four are Sunbonnet Sue and four are Sunhat Sam. These patterns can be used as quilt blocks as well as potholders.
To leave a post, just click on "COMMENTS", below. Be sure and leave your name, so I can find your email address in my contacts list. If you are not in my contacts list, you can email me your information by going to Prairie Cottage Corner using the link at the top right of this page.
Happy Stitching!!!